
Transcoding to Windows Media Format
May 19, 2009 0
If you want to use NetroMedia’s Windows Media On Demand Service to distribute your content, it must be in WMV format.
Download and Install Windows Media Encoder from here; http://www.microsoft.com/windows/windowsmedia/forpros/encoder/default.mspx
System requirements are found here; http://www.microsoft.com/windows/windowsmedia/forpros/encoder/sysreq.aspx Start Windows Media Encoder from your Start Menu
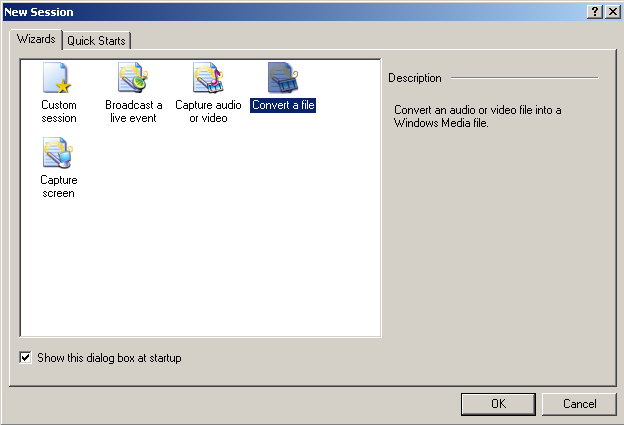
From the New Session Wizard, select “Convert a File” and click “Ok”
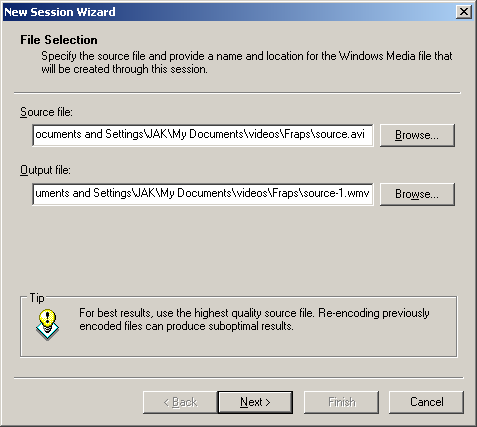
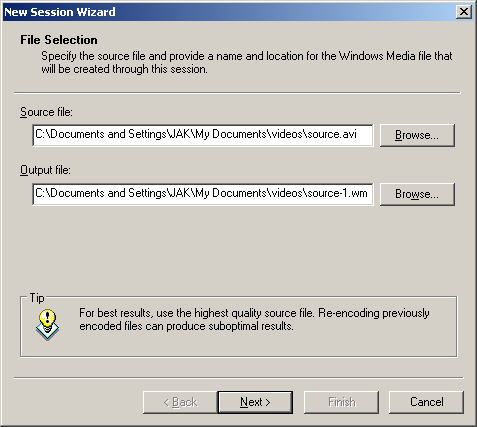
You will be presented with the “File Selection” screen (be sure to make a note of the Storage Location of the Output File – by default this is the same as the Input File’s Location);
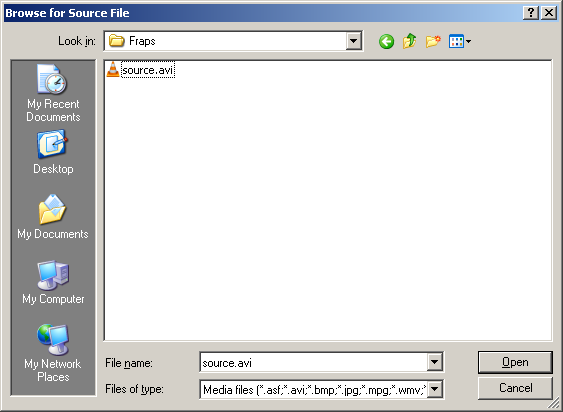
Click “Browse” and navigate to where your source file is stored, click on it, and click “Open”
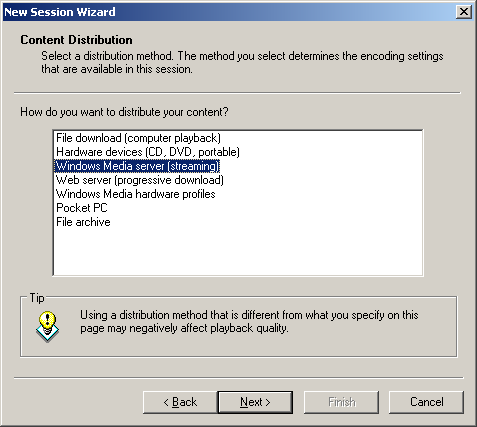
Select “Windows Media Server (streaming)”and click “Next”
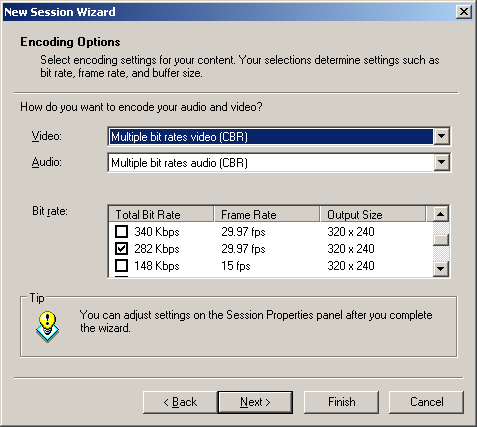
Select your desired bit rate and click “Next”, for help with choosing a bit rate, Click Here
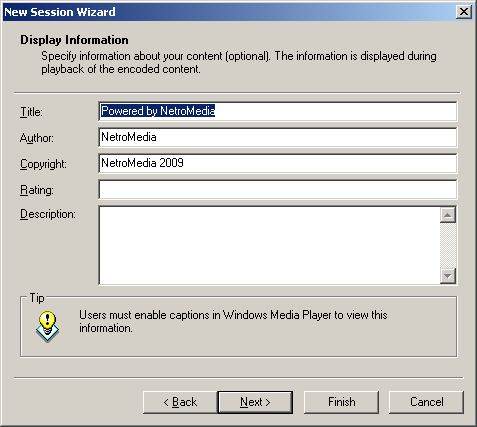
Enter details for your Video as needed, click “Next”
Select “Begin convertig when I click Finish” – and click “Finish”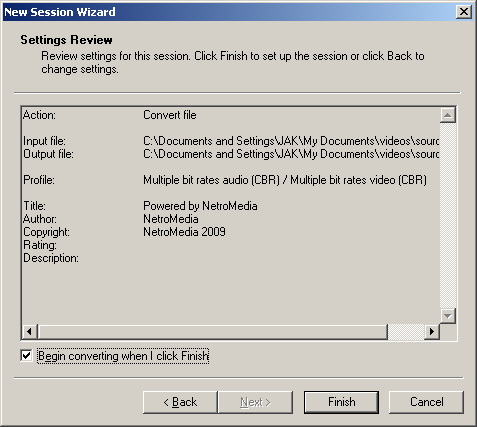
Once complete, retrieve your newly encoded file from the Storage Location you noted earlier, and upload to our service, using the following Solution, How to use FTP as a guide.
If you need further support, please, Create a Support Ticket
Note: Windows Media Encoder is no longer supported, please see the latest FAQ for Microsoft Expression encoder here.
Download and Install Windows Media Encoder from here; http://www.microsoft.com/windows/windowsmedia/forpros/encoder/default.mspx
System requirements are found here; http://www.microsoft.com/windows/windowsmedia/forpros/encoder/sysreq.aspx Start Windows Media Encoder from your Start Menu
From the New Session Wizard, select “Convert a File” and click “Ok”
You will be presented with the “File Selection” screen (be sure to make a note of the Storage Location of the Output File – by default this is the same as the Input File’s Location);
Click “Browse” and navigate to where your source file is stored, click on it, and click “Open”
Select “Windows Media Server (streaming)”and click “Next”
Select your desired bit rate and click “Next”, for help with choosing a bit rate, Click Here
Enter details for your Video as needed, click “Next”
Select “Begin convertig when I click Finish” – and click “Finish”
Once complete, retrieve your newly encoded file from the Storage Location you noted earlier, and upload to our service, using the following Solution, How to use FTP as a guide.
If you need further support, please, Create a Support Ticket